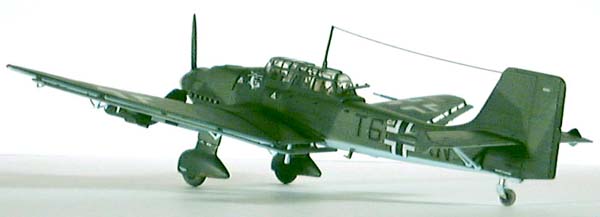
Junkers Ju 87B-2
5 Staffel/Stukageschwader 2 "Immelman," Lannion, France, August 1940
© Randy Asplund
|
|
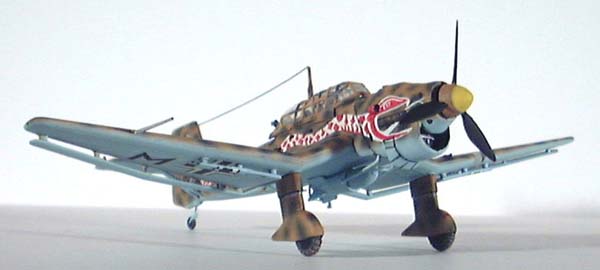
Junkers Ju 87B-2
2 Staffel/Stukageschwader 2 North Africa 1941
© Randy Asplund
Highly modified MPC Kit 1/72 scale
|
At the end of fifth grade my friend Keller moved to
San Francisco and gifted me with the remains of some of his models
and unbuilt kits. I kept these for spare parts in scratch building
and kit-bashing. One of the items he left was a bag of parts for
an MPC model of the Ju 87 Stuka, but it was incomplete. Let me
start by saying that this is one of the absolute worst kits I
have ever seen. Poorly molded, inaccurate, corners cut on detailing
so much it looks like a toy for preschoolers. I just can't describe
it all. To make matters worse, it was missing the canopy and left
horizontal stabilizer, missing the right aileron/flap, and had
no decals. When I was a kid, I had the Revell 1/32 scale model of a Ju 87B used in North Africa and marked with a red and white snake. I thought it was just really cool, but over the years the model was wrecked and the pieces lost. I was resolved to replace it, so I figured I would buy a 1/72 Stuka and convert it. In 2000 I bought the Airfix Ju 87B, but I decided I really wanted a copy of one that was marked for the Battle Of Britain. The new model was actually rather well done, so I decided to use it as a pattern to manufacture new parts for the cheap piece of crap from MPC. I decided that the MPC model would represent a serious challenge that I would use to test my model building ability. THE JOB
On the Airfix kit I did a fair bit of extra work. Using photos and illustrations in books I created the cockpit with stretched sprue for the internal cage and sheet plastic to make details like the wall, radio and extra seat details. I also made balances for the ailerons, added details on the bomb, and cleaned out the air scoops. The MPC kit was the real job. I vacu-formed a new canopy over the Airfix canopy, carved a new stabilizer and made matching rivets and cut the lines for the elevator. It also needed a hinge flange to go on the outside edge. There was no attempt at a cockpit. They actually left it fared over and had two holes for half of a pilot to get plopped into! So I had to remove that and build an entire cockpit from scratch. What a pain. I had to scrounge a tail wheel, and I had to construct a new aileron/elevator assembly out of sheet. The maker had totally skimped on the intakes. They didn't even bother to back hollow them at all. Where there should be a huge air scoop is just a flat surface. Even worse, the upper engine cowling was pretty smooth. It was only a minimal attempt to imply that air scoops existed at all! How they had the conscience to put their names on this I'll never understand. I had to cut them all open and remove much of the top of the engine cowling altogether. While I was at it I opened the air scoop on the right side of the fuselage and made a miniature grill for it. I made a radiator grill for the inside of the now opened radiator cowling. I then had to use sheet plastic and build the flat cover and out vent flap of the oil cooler on the upper cowling. This was built up with a lot of putty and then sculpted back down to the proper contours. I had to carve deep into the plastic of the top of the nose to make the intake path. The wheels were way too narrow, but I let that slide. I cut the tread grooves in the tires though. Neither model had seen fit to provide a clear piece for the wing mounted landing light. so I had to make that as well. Almost as disappointing as the lack of cockpit and nose detail was the way they wimped out on the bomb. it was the wrong shape, but the top part was hollowed out and secured to the fuselage by two big ugly pins. They didn't bother to include the swinging bomb rack (which is a pretty critical mechanism for a dive bomber!). Geeze! I had to build a new one out of sprue. I also had to make the two steps that protrude from the rear of the fuselage and the trailing antenna mast. Decaling was aided by some crosses and letter insignia from the left-overs of other model kits, but I didn't have enough, and I didn't have a snake! I had to hand paint some of the letters on the fuselage and hand paint the snake onto both sides. The, decaling over those shapes would have been tricky anyway, so what the heck. I just noticed that the propeller spinner is on crooked! Argh! I wanted to be able to reposition the propeller for photography, so I put in a weak kind of cap so it would revolve. It was really loose, so I used rubber cement to hold it. I guess it popped before I shot the photo. Please forgive. |